Shaun from AED has put together a windage tray/crank scraper kit for all metal pan/pickup tube Coyote engines. As old time engine guys know, keeping the oil from whipping around on the crank causing aeration prevents both air in the oil (foaming) and a lack of steady return to the sump of a wet sump engine. The scarper assists in this by shaving the oil from the counterweights and rod caps and bolt heads. The mesh windage tray intercepts the oil that does remain on the crank bottom and the surface tension de aerates the oil and allows it to drop into the sump. The install goes as follows.
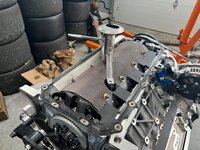
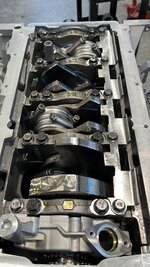
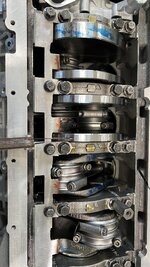
1) Remove oil pan and pickup tube. Remove OEM gasket tray. The 5 outer main bearing caps on the Passenger side are removed to allow fitting of the crank scraper. See Pics 7 and 8. The scraper has to be fit to each individual engine as there are variances in blocks, cranks and rods. Shaun has the scraper cut for OEM style Gen 2 5.0 Coyotes. Clearances are .010 for the counterweight sides and edges (I used .011") and .030" for the rod caps, bolts and sides. This is where most of my fitting work took place. Ensure you check each rod set, by rotating and checking in multiple positions. Also thrust the crank forward and back (end play) and check the counterweight clearances.
2) Once the scraper is fit, reinstall main cap bolts and torque to 10ft/lbs, then 30 ft/lbs and finally 90 degrees per Ford manual. If you have ARP main stud, follow their instructions for torque.
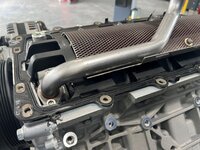
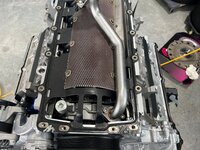
3) Fitting the gasket and tray. Place the gasket/windage tray onto the pan rails. Ensure the metal fingers on the passenger side fit into the drainback passages in the block, and that the gasket sits properly on the rail. Two of the plastic locator tabs on the engine side of the tray contacted the crank scraper. This is not common but two snips with diagonal cutters and mine fit perfectly at this stage so no filing of the fingers was needed. Next place the pump pickup tube in place. My pickup tube did interfere with the front two studs holding the windage screen, they were cut flush with the nut top and no longer bothered the tube.
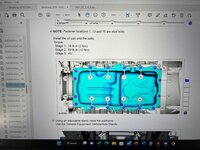
4) Pan fitting. Thinking I had it made I removed the pickup and tray, applied the silicon sealant to the front cover and oil seal retainer to block joints and reset the gasket/tray. Then while placing the pan, I discovered the GT500 pan has a bump in that fouls against front 2 1/2" of the bent metal shield that helps shed oil back to the sump. Shaun said it can be bent to clear, I chose to slice it off at the bend line for the length required. At this point I recleaned the silicone off the block and gasket, reapplied the sealant and final fitted the gasket/tray and oil pan in place. Start all oil pan bolts to ensure gasket remains in line with the block holes the tighten per Ford spec. 10 inch/pounds, then 89 in/lbs and finally an additional 45 degrees. See attached pic for sequence.
This is an advanced level project in line with doing a timing cover/damper remove and replace. The kit is well made and includes detailed instructions. And understanding of engine assembly and clearances is assumed. I am pleased with it and knowing that the oil control will be much improved, providing reliability, and theoretically both a small horsepower increase and lowered oil temps it is worth the $500 shipped cost that i paid for it.
If I missed anything or if there are questions please chime in, there are no stupid questions, only questions stupidly unasked.
Steve
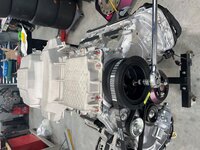
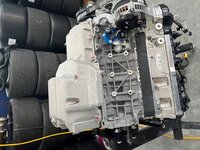
Oh by the way, if you are planning on doing this job, do it exactly as I show here, on an engine stand, making sure to clean any parts that were trimmed or filed before putting them back on the motor.


