The Mustang Forum for Track & Racing Enthusiasts

Taking your Mustang to an open track/HPDE event for the first time? Do you race competitively? This forum is for you! Log in to remove most ads.

  • Welcome to the Ford Mustang forum built for owners of the Mustang GT350, BOSS 302, GT500, and all other S550, S197, SN95, Fox Body and older Mustangs set up for open track days, road racing, and/or autocross. Join our forum, interact with others, share your build, and help us strengthen this community!

Home Camber Adjustment

This site may earn a commission from merchant affiliate links, including eBay, Amazon, and others.

Right now I have camber bolts and am limited to camber adjustments at a shop.
What is the best way to do camber adjustments at home/trackside that are accurate?
Are caster/camber plates enough?
If I get caster/camber plates should I restore the camber bolts to factory bolts?
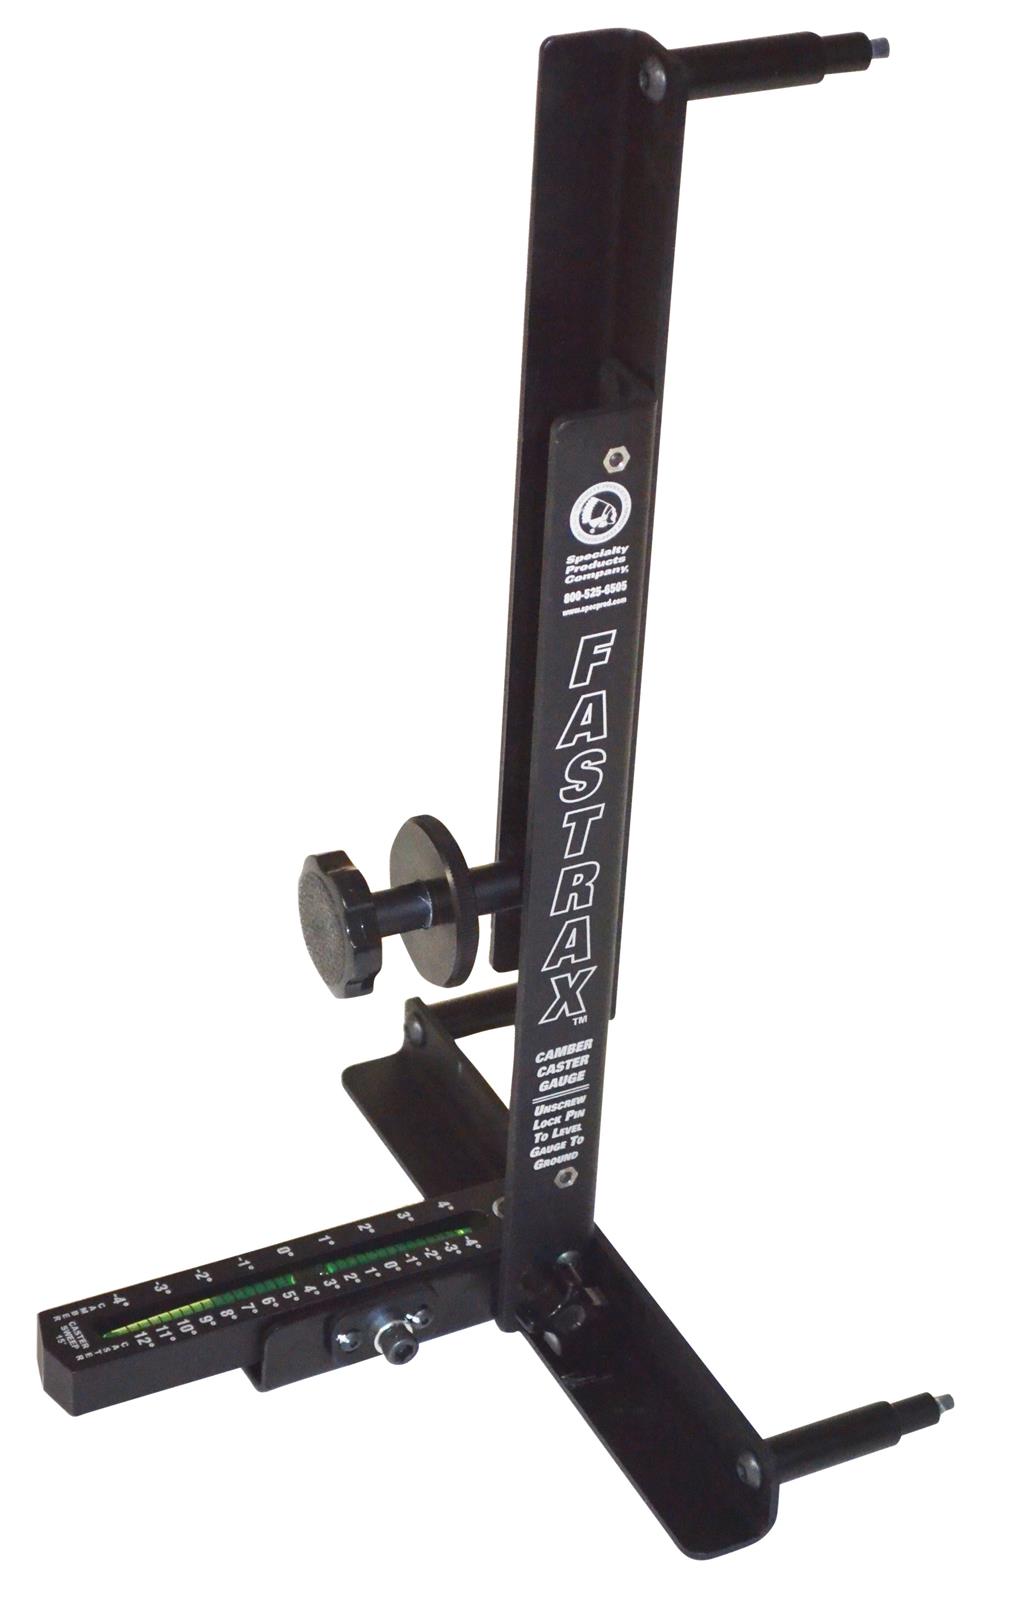
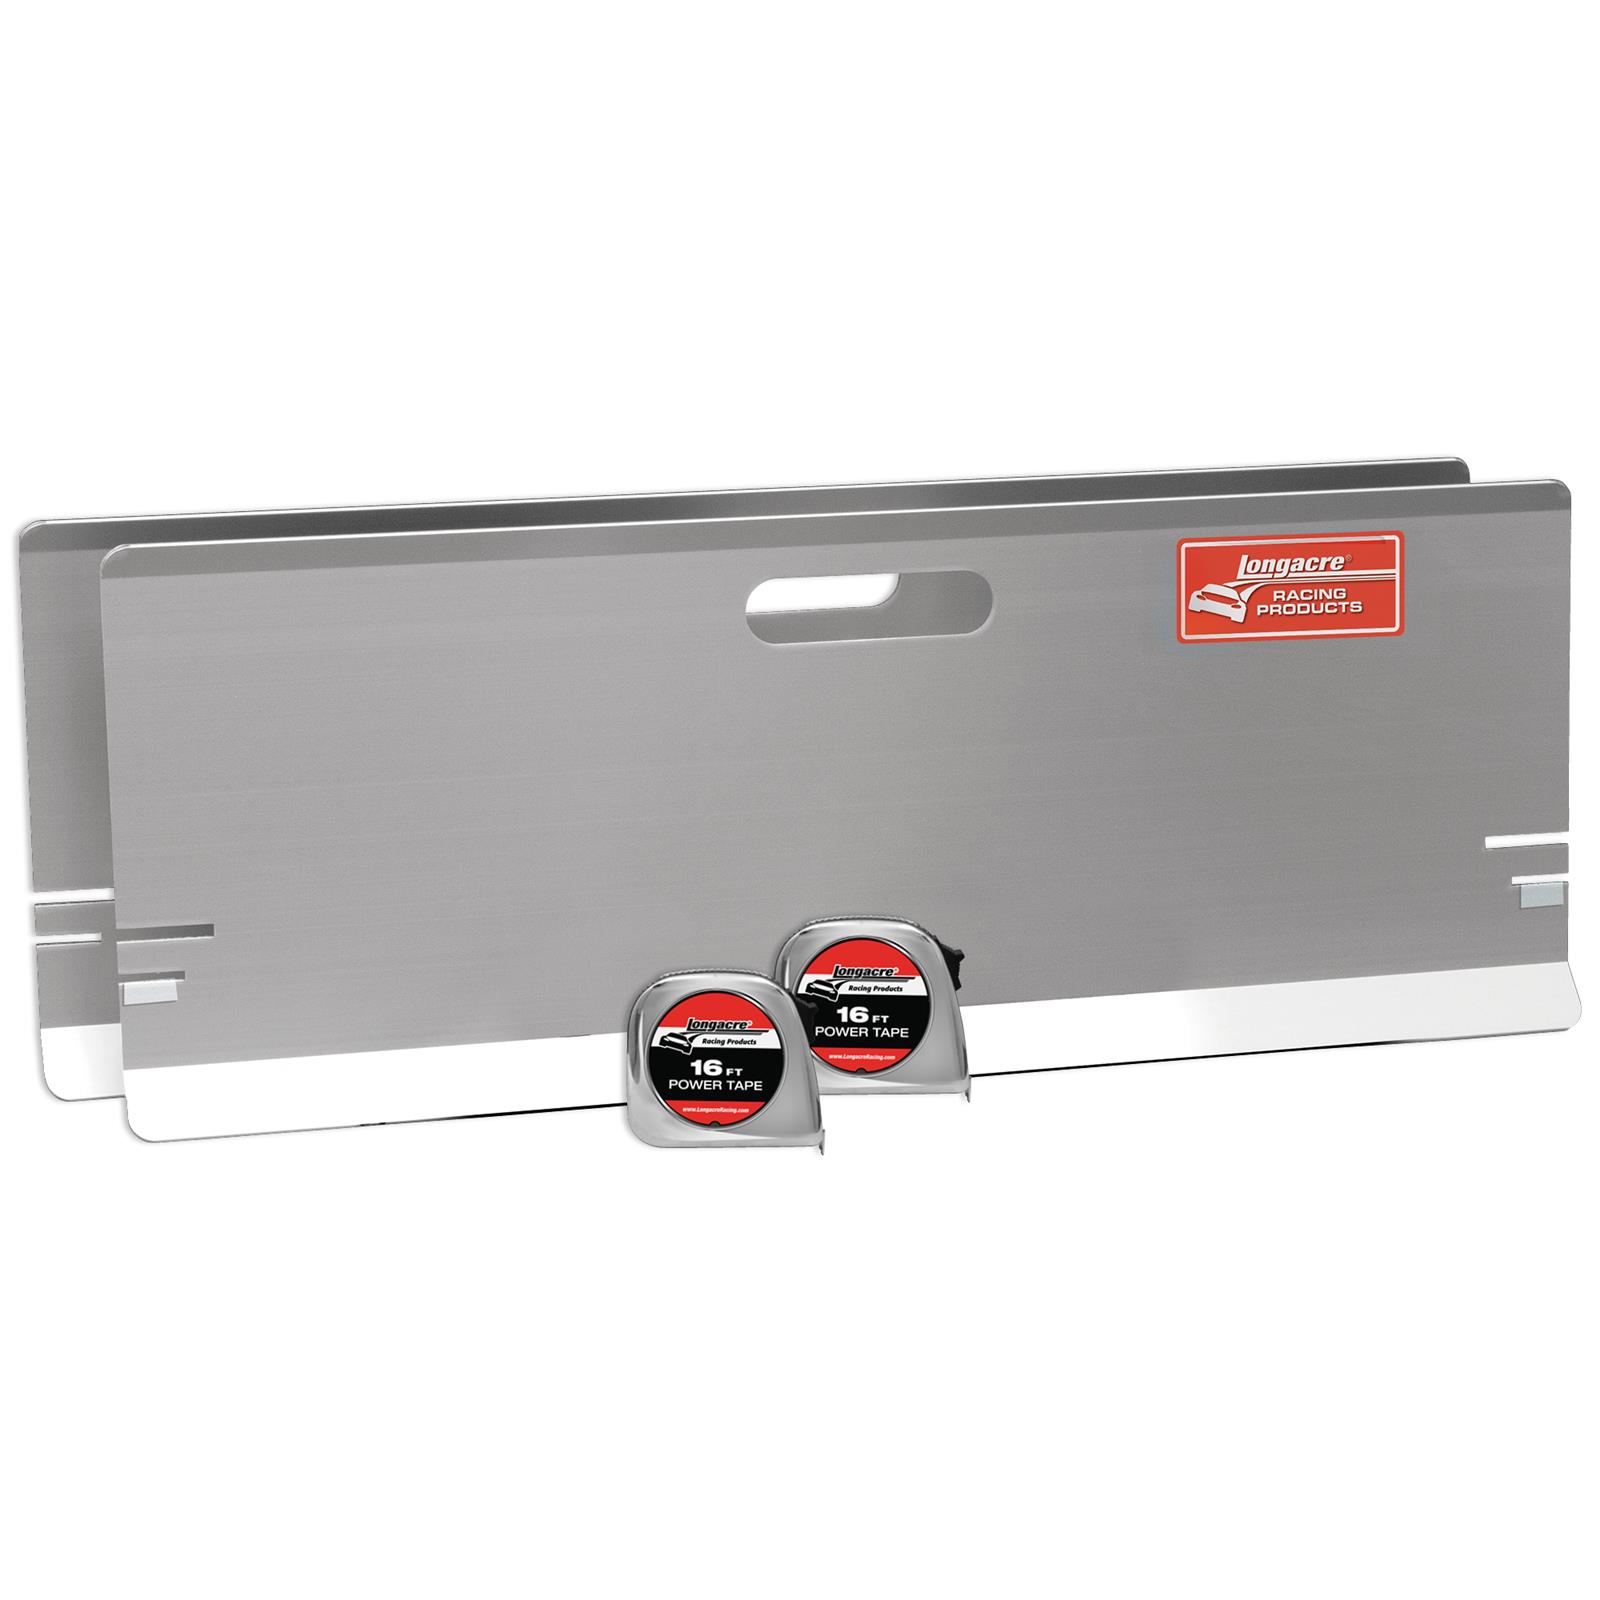
What do you all use to determine the degrees of camber when you do adjustments?
 

PatientZero

@restless_performance
825
867
Exp. Type
Autocross
Exp. Level
10-20 Years
Kansas City, Missouri
I use a gauge like this to do my alignments at home.
sps-91000_uq_xl.jpg

Alternatively, once you get camber plates you could have the shop set your camber to a couple different settings and make marks on your camber plates so you can easily move it at the track to a repeatable position. The camber plates have marks on them but usually don't match side to side because of manufacturing differences. When you get plates I would go back to stock bolts.
 
1,249
1,243
In the V6L
I use a gauge like this to do my alignments at home.
View attachment 57684

Alternatively, once you get camber plates you could have the shop set your camber to a couple different settings and make marks on your camber plates so you can easily move it at the track to a repeatable position. The camber plates have marks on them but usually don't match side to side because of manufacturing differences. When you get plates I would go back to stock bolts.
I bought a pair of these to do the alignment on my GT350 and a few points: first, for 19" rims you need part number SPS-91010 - the one in the link only works up to 18" rims. Second, you can do toe-in with these if you add SPS-91100 arms, and last the 91030 no-lip adapters are handy if you want to be able to hang it on the rim and know it won't fall off.

Also, that bubble level is pretty accurate, but it makes a perfect platform to sit a Longacre digital camber gauge on to get down to even finer resolution.
 
Another option, and I couldn't tell you how they compare, is the Tenhulzen products. I use their hands free camber gauge that comes with a digital gauge. It can be calibrated to a non-level surface if that's what you have to deal with to get a accurate reading still which I'm sure other brand gauges may do as well. It's also wheel size adjustable up to 20" wheels.


If your going to be messing with camber say from street to track and back or whatever, camber plates are your friend and should offer you much more range than the camber bolts. Try ditching those camber bolts and see what kind of negative camber you can achieve with plates and in most cases, it's plenty. If not, put the bolts back in to get that much more but make sure you have the clearance strut/coilover to wheel/tire.

Also note, anytime you change camber, toe is also being affected. Maybe to a point you can live with but none-the-less something to consider. I also have the toe plates from Tenhulzen as well.
 
6,400
8,291
To be honest. the hardest thing about home alignments is getting the car on a flat, level piece of concrete. That's why a lot of competitors bring scales to the races, the pads allow them to adjust to level. I would grab a general baseline level at your home or shop, mark that spot on the floor, then get some square pieces of metal or even non stick floor tile squares (use your imagination here) to establish a true "level" . At that point you can adjust the car at home, then add the camber/caster, and mark those points on the car chassis.
This will give you an accurate reading at home, and will allow you to adjust it at the track without using a chassis plate, level, etc.at the track, but you will still have to set the toe. which is not that big of a deal.

This is me doing some basic setup, there's no engine (or springs) in the car so I used wood blocks to establish the ride height.

some ideas, also note the toe in gauge I built.
wUFukoml.jpg

i1s3yIvl.jpg

8Qji7Lol.jpg

m33cfiCl.jpg

ZLReApnl.jpg
 
1,249
1,243
In the V6L
To be honest. the hardest thing about home alignments is getting the car on a flat, level piece of concrete. That's why a lot of competitors bring scales to the races, the pads allow them to adjust to level. I would grab a general baseline level at your home or shop, mark that spot on the floor, then get some square pieces of metal or even non stick floor tile squares (use your imagination here) to establish a true "level" . At that point you can adjust the car at home, then add the camber/caster, and mark those points on the car chassis.
This will give you an accurate reading at home, and will allow you to adjust it at the track without using a chassis plate, level, etc.at the track, but you will still have to set the toe. which is not that big of a deal.

This is me doing some basic setup, there's no engine (or springs) in the car so I used wood blocks to establish the ride height.

some ideas, also note the toe in gauge I built.
View attachment 57696

View attachment 57697

View attachment 57698

View attachment 57699

View attachment 57700
Exactly! I level mine with floor tiles and sheets of paper. The tricky bit is finding something on the car that's actually level across the chassis. I confirm that the wheels are level using a laser level. I measure up from the bottom of each rim to the laser line with a mm tape measure and then I measure the ride height the same way. By the way, it has to be level at both ends when you measure camber. If one end is off level across the vehicle, then the chassis will sit at an angle to the wheels and the measurements will be off.
 

PatientZero

@restless_performance
825
867
Exp. Type
Autocross
Exp. Level
10-20 Years
Kansas City, Missouri
Exactly! I level mine with floor tiles and sheets of paper. The tricky bit is finding something on the car that's actually level across the chassis. I confirm that the wheels are level using a laser level. I measure up from the bottom of each rim to the laser line with a mm tape measure and then I measure the ride height the same way. By the way, it has to be level at both ends when you measure camber. If one end is off level across the vehicle, then the chassis will sit at an angle to the wheels and the measurements will be off.

To play devil's advocate here. The number doesn't matter and getting that extensive trying to make it perfect to the chassis is a waist of time in my opinion. What matters is whatever number you've chosen gives the most even tire temps during your prefered driving and that number is repeatable if you have multiple setups.

If I measure -3 with my method but you measure -3.2 with your method it is mostly irrelevant as long as it's physically working for the car.

I measure things for a living. Down to .000001", so no matter how you do it, it's not going to be perfect in my world. Just get it in the ballpark then adjust accordingly based on you're tire wear.

Another method you can try is getting a large square and set it on the ground touching the bottom of the tire and measure the distance between the top of the square to the face of the wheel. With a little trig you can figure out your camber angle that way. But again, the actual number doesn't matter.
 
Thanks for all the advice! I think I’ll wait to start doing home adjustments until I can get camber plates. Accessing the bolts with the wheel on and the car at ride height is pretty impossible without a lift.
 

yotah1

Ford Employee
386
598
Detroit
I'll join the others regarding home adustments, make sure you're on a flat / level surface before doing anything. I get the Shelby on ramps, then adjust the level with plastic interlocking tiles that i have leftover from my garage flooring. A good quality level allows me to make sure the car is level in various places and the suspensions are not over-compressed on one corner for example.

Then I simply use a digital camber gauge like shown above with a magnetic base that I put against my rotors, and I bought a set of strings with adjustable mounts from BG Racing, along with a "dream stick" toe angle gauge.

That got me a much better alignment and a much better handling car for my last trackday compared to what the last shop did with their fancy 20k$ alignment machine...
 
6,400
8,291
To play devil's advocate here. The number doesn't matter and getting that extensive trying to make it perfect to the chassis is a waist of time in my opinion. What matters is whatever number you've chosen gives the most even tire temps during your prefered driving and that number is repeatable if you have multiple setups.

the issue I have with that is that I've seen 40 plus difference in tire temps outside to inside

d5vcfvjl.jpg
 
6,400
8,291
But did it wear evenly?
they never wear evenly, they run on the inside edge down the straights, then transition to scrubbing the outer half of the tire in the corners, the inner 1/4 of the tire looks almost brand new. We're limited to 3 degrees of camber, so that's what you get, no way around it. with regards tot he pic I posted, that's just about perfect, no changes forthcoming, we didn't even bump the rears a pound or so lower, we just sent it.
 
316
264
Exp. Type
HPDE
Exp. Level
3-5 Years
25 min. to 1½ hrs. from Sonoma (ugh... traffic!)
Another method you can try is getting a large square and set it on the ground touching the bottom of the tire and measure the distance between the top of the square to the face of the wheel. With a little trig you can figure out your camber angle that way.


I've used a cardboard template and a plumb bob and came very close before getting alignment:


Camber illustration.jpg
 
Last edited:
2,203
1,067
Bay Area
I have a tool, that was made by another member that I will be testing and dialing in around the second week of September. It’s already been used and proven since 2016 but I want to have the data before I show it.
 
539
687
Exp. Type
Time Attack
Exp. Level
3-5 Years
SoCal
I know this will be an obvious and "dumb" question for many of you but hey, I gotta learn somewhere...

I've read through all the above posts and there is tons of great info but for those of you doing home/track alignments, how do you keep track of different toe positions? I understand changing camber will change toe and I understand how to mark different settings for camber but how do you mark different settings for toe? Count number of turns or mark with paint?
 

PatientZero

@restless_performance
825
867
Exp. Type
Autocross
Exp. Level
10-20 Years
Kansas City, Missouri
I know this will be an obvious and "dumb" question for many of you but hey, I gotta learn somewhere...

I've read through all the above posts and there is tons of great info but for those of you doing home/track alignments, how do you keep track of different toe positions? I understand changing camber will change toe and I understand how to mark different settings for camber but how do you mark different settings for toe? Count number of turns or mark with paint?

If would be very hard to do that because it's moving such a small amount. Just get a set of toe plates and set the toe. It only takes a couple minutes.

1598473218684.png
 
539
687
Exp. Type
Time Attack
Exp. Level
3-5 Years
SoCal
If would be very hard to do that because it's moving such a small amount. Just get a set of toe plates and set the toe. It only takes a couple minutes.

View attachment 57733
Thank you very much sir! That's an easy solution too
 
1,249
1,243
In the V6L
Thank you very much sir! That's an easy solution too
It really isn't practical to adjust toe while the car is on the ground, so you measure it on the ground and adjust it in the air. I put a wrap of masking tape with witness marks on the tie rod, the nut and the rod-end before I start. Then I loosen the lock nut and line up all the marks again. Then I count flats on the nut as they go by when I turn the tie rod. Make equal change on both sides so the steering wheel always sits centered. Thing is, if you change camber, it changes toe - more negative camber gives more toe out. But the reverse doesn't happen - you can change toe all you want and the camber stays put.
 

TMO Supporting Vendors

Top