The Mustang Forum for Track & Racing Enthusiasts

Taking your Mustang to an open track/HPDE event for the first time? Do you race competitively? This forum is for you! Log in to remove most ads.

  • Welcome to the Ford Mustang forum built for owners of the Mustang GT350, BOSS 302, GT500, and all other S550, S197, SN95, Fox Body and older Mustangs set up for open track days, road racing, and/or autocross. Join our forum, interact with others, share your build, and help us strengthen this community!

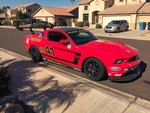
S197 BOSS 302 Race Car Build Thread Build Thread

This site may earn a commission from merchant affiliate links, including eBay, Amazon, and others.

Grant 302

basic and well known psychic
steveespo said:
OK Grant so I kinda get it.
Here is my take on the procedure based on what you describe and freedoms video
Remove, coils, cam covers.
Rotate cylinder to be worked on to TDC
Remove cam bearing caps on cylinder to be worked on.
Install freedom racing spring compressor on pair of valve springs and compress
Depress lash adjuster and slide follower (rocker arm) out from between cam and valve tip????
Remove keepers, retainers and springs
Install new springs, replace retainers and keepers, slide follower back in place.
Release spring compressor and remove.
Reinstall cam bearing caps and retorque NEW bolts to spec.
Repeat on cylinder that is opposite in the firing order, (at TDC on cam base circle)
Rotate crank 90 degrees and repeat 3 more times.
Reinstall cam covers, coils and the rest of parts removed for access
Rev to 8000 rpm

I think I got it right. Freedom racing does have a good video which shows the process on "bare" heads with no cams installed but if shows how their tool works very clearly. No vids on you tube showing the job in car with cams in place that I could find though.

Guess I have my next project, considering I have run stock Coyote springs on track for 4 years now at reclines from 7000 to now 7700 rpm, might be fun to freshen them up prior to the big long lock swap that hopefully won't happen until this time next year.

Steve

I think you got it right, but you do use the tool twice per cylinder since it works on either the intake pair or the exhaust pair when the tool is positioned over the respective cam, like they show on their video.

I don't know about the need to use new bolts in the cam caps. I don't recall those being TTY on the 2V.

And I'd make sure to have a set of any gaskets that may be damaged like the cam covers.

Block oil drain-back holes so you can't lose any of the keepers or retainers.
 

TMSBOSS

Spending my pension on car parts and track fees.
7,609
5,374
Exp. Type
HPDE
Exp. Level
10-20 Years
Illinois
Back in the day we would apply compressed air to the cylinder to keep the valve from dropping when changing springs, oil seals and such.

I understand the procedure now is to turn the crank until that hole is at TDC. This is intended to keep the valves nearly closed.

Is there a benefit to charging the cylinder with compressed air?

How far do you have to compress the spring to release the keepers when the valve drops to the piston?

Good idea on blocking the drain back holes. Although having to remove the pan to fish out a keeper or two would be the perfect excuse to install a Moroso aluminium pan. ;D
 

steveespo

Lord knows I'm a Voodoo Child
Moderator
4,110
2,231
Exp. Type
W2W Racing
Exp. Level
10-20 Years
Cookeville TN
Thanks guys, and yes twice per cylinder intake and exhaust sides. I'm pretty sure the manual says new cam cap bolts but if not, so much the better, and yes it's wise to have new gaskets and to stuff any openings with paper towel. I will be ordering some parts today.
Steve
 

Grant 302

basic and well known psychic
ArizonaBOSS said:
Made this oil adapter remover tool for $2.40. Too bad the one for the BOSS cooler is smaller.
10888563_10100810839143854_7409859659048896366_n.jpg

Forgot to say I like your $2.40 solution here! 8) Good luck firing up tomorrow...looking forward to any videos you might take!


Steve, I was thinking about the differences between the 4V and the 2V, and I think you'd have to make all 8 stops on the crank. The 2V tool grabs outside the cam lobes so the lobe orientation doesn't matter, IIRC. I think it might with the freedom racing tool's 'shoes'. Well, maybe just the arm part of the shoe.
 

ArizonaBOSS

Because racecar.
Moderator
8,744
2,766
Arizona, USA
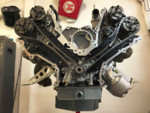
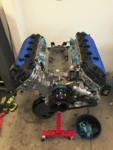
Engine itself is all back together and ready to go into the car tomorrow.

Steve--for your preparation; this seemed very intimidating on both the tear down and build-up portions, but now having completed it I can say that this is all very simple if you follow the FSM procedures and also label and bag everything.
You'll need new gaskets for any parts that come off (save for valve cover and oil pan--at your discretion, though), and anything that is torque-to-yield as far as bolts are concerned. But really, this was a pretty painless build.

ilVAdgK.png

qFSZbMd.png

li6Vb8c.png

Grant I may try to get a video of it firing up but that will not be my first priority. I will probably have someone getting a video of me driving it around the block, assuming all goes well :)
 

302 Hi Pro

Boss 302 - Racing Legend to Modern Muscle Car
2,009
441
Southeast
Very nice job ArizonaBoss!

Good luck with your final assembly and start up.

Can you "pre-lub" the engine by cranking it without spark plugs installed? It will spin fast without compression, and fill the oil coolers, etc., then install the plugs, and fire her up?

Just thinking out loud,

Dave
2HP
 

Grant 302

basic and well known psychic
Dave, pre-lube is done by matting the throttle then cranking the engine. No need to disconnect the plugs or anything. Great suggestion, btw. Somebody at Ford was thinking when this was programmed into our PCMs.
 

ArizonaBOSS

Because racecar.
Moderator
8,744
2,766
Arizona, USA
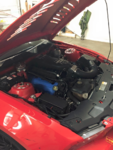
OK it is in the car and RUNNING!

I slathered everything in assembly lube before install; not sure what you mean about "pre lube" procedure since the gerotor oil pumps these engines have won't generate enough oil pressure at cranking RPM to do anything.

The engine was a challenge to drop in from the top side with the Watson motor mounts and the Moroso pan. We ended up disconnecting most of the K-member as well as the tranny to get enough angle without crushing that stupid transmission vent tube. Doing this from the bottom and just dropping the whole K-member out would have been much quicker (duh). We also had to disconnect one of the Watson mounts from the block to get it past the front unibody "frame rails" from the top. If you're doing a "drop-K" install this will not be an issue.

Gotta figure out what I want to do for break-in other than just driving around the neighborhood and scaring people's pets. Might just do a 30 minute dyno session followed by some pulls for 2015 classing.

84D9cab.png

la8A6Hn.jpg


Looking forward to getting back on-track at the end of January.
 

ArizonaBOSS

Because racecar.
Moderator
8,744
2,766
Arizona, USA
Fomoco302 said:
We want to HEAR it! Please!!

I will get a video tomorrow with the fresh engine when I have a chance to exercise it a little around the neighborhood :)

In the meantime, please enjoy some sights and sounds on my Youtube channel!
 

Grant 302

basic and well known psychic
ArizonaBOSS said:
I slathered everything in assembly lube before install; not sure what you mean about "pre lube" procedure since the gerotor oil pumps these engines have won't generate enough oil pressure at cranking RPM to do anything.

The PCM is programmed not to fire or fuel if you mat the throttle while cranking. It's not for pressure...the only thing it would do is prime/fill all the oil galleys first before firing. Assembly lube will easily protect the engine for the 10-20 seconds for the galleys to fill if the oil filter is primed. I do this any time the engine has sat for a while or when changing filters or adding oil coolers, etc.

ArizonaBOSS said:
The engine was a challenge to drop in from the top side with the Watson motor mounts and the Moroso pan.
Had the same problem with a Moroso pan on my 2V. Consider yourself lucky if you didn't have to notch a seam weld.
 

ArizonaBOSS

Because racecar.
Moderator
8,744
2,766
Arizona, USA
Steve: absolutely. I already have another 12 quarts ready to go before the upcoming track event, along with a stockpile of filters.

I will probably change it after that event as well, then back to every other event as usual.
 

ArizonaBOSS

Because racecar.
Moderator
8,744
2,766
Arizona, USA
Someone asked to hear the car--so here it is. It's a cold start so no revs, sorry. You can see the oil temp on the dash lol.
This was just after siphoning the remaining 5 gallons of junk 91 fuel from the tank via the fuel pump access hole in the car. This is the first start with straight 100 and it takes a second to get constant fuel flow before firing.

 
Last edited:
380
2
Congrats!

I've never done a build of something on this scale, but I can imagine the anticipation and nervousness before turning the key the first time. Sounds great.
 

TMO Supporting Vendors

Top