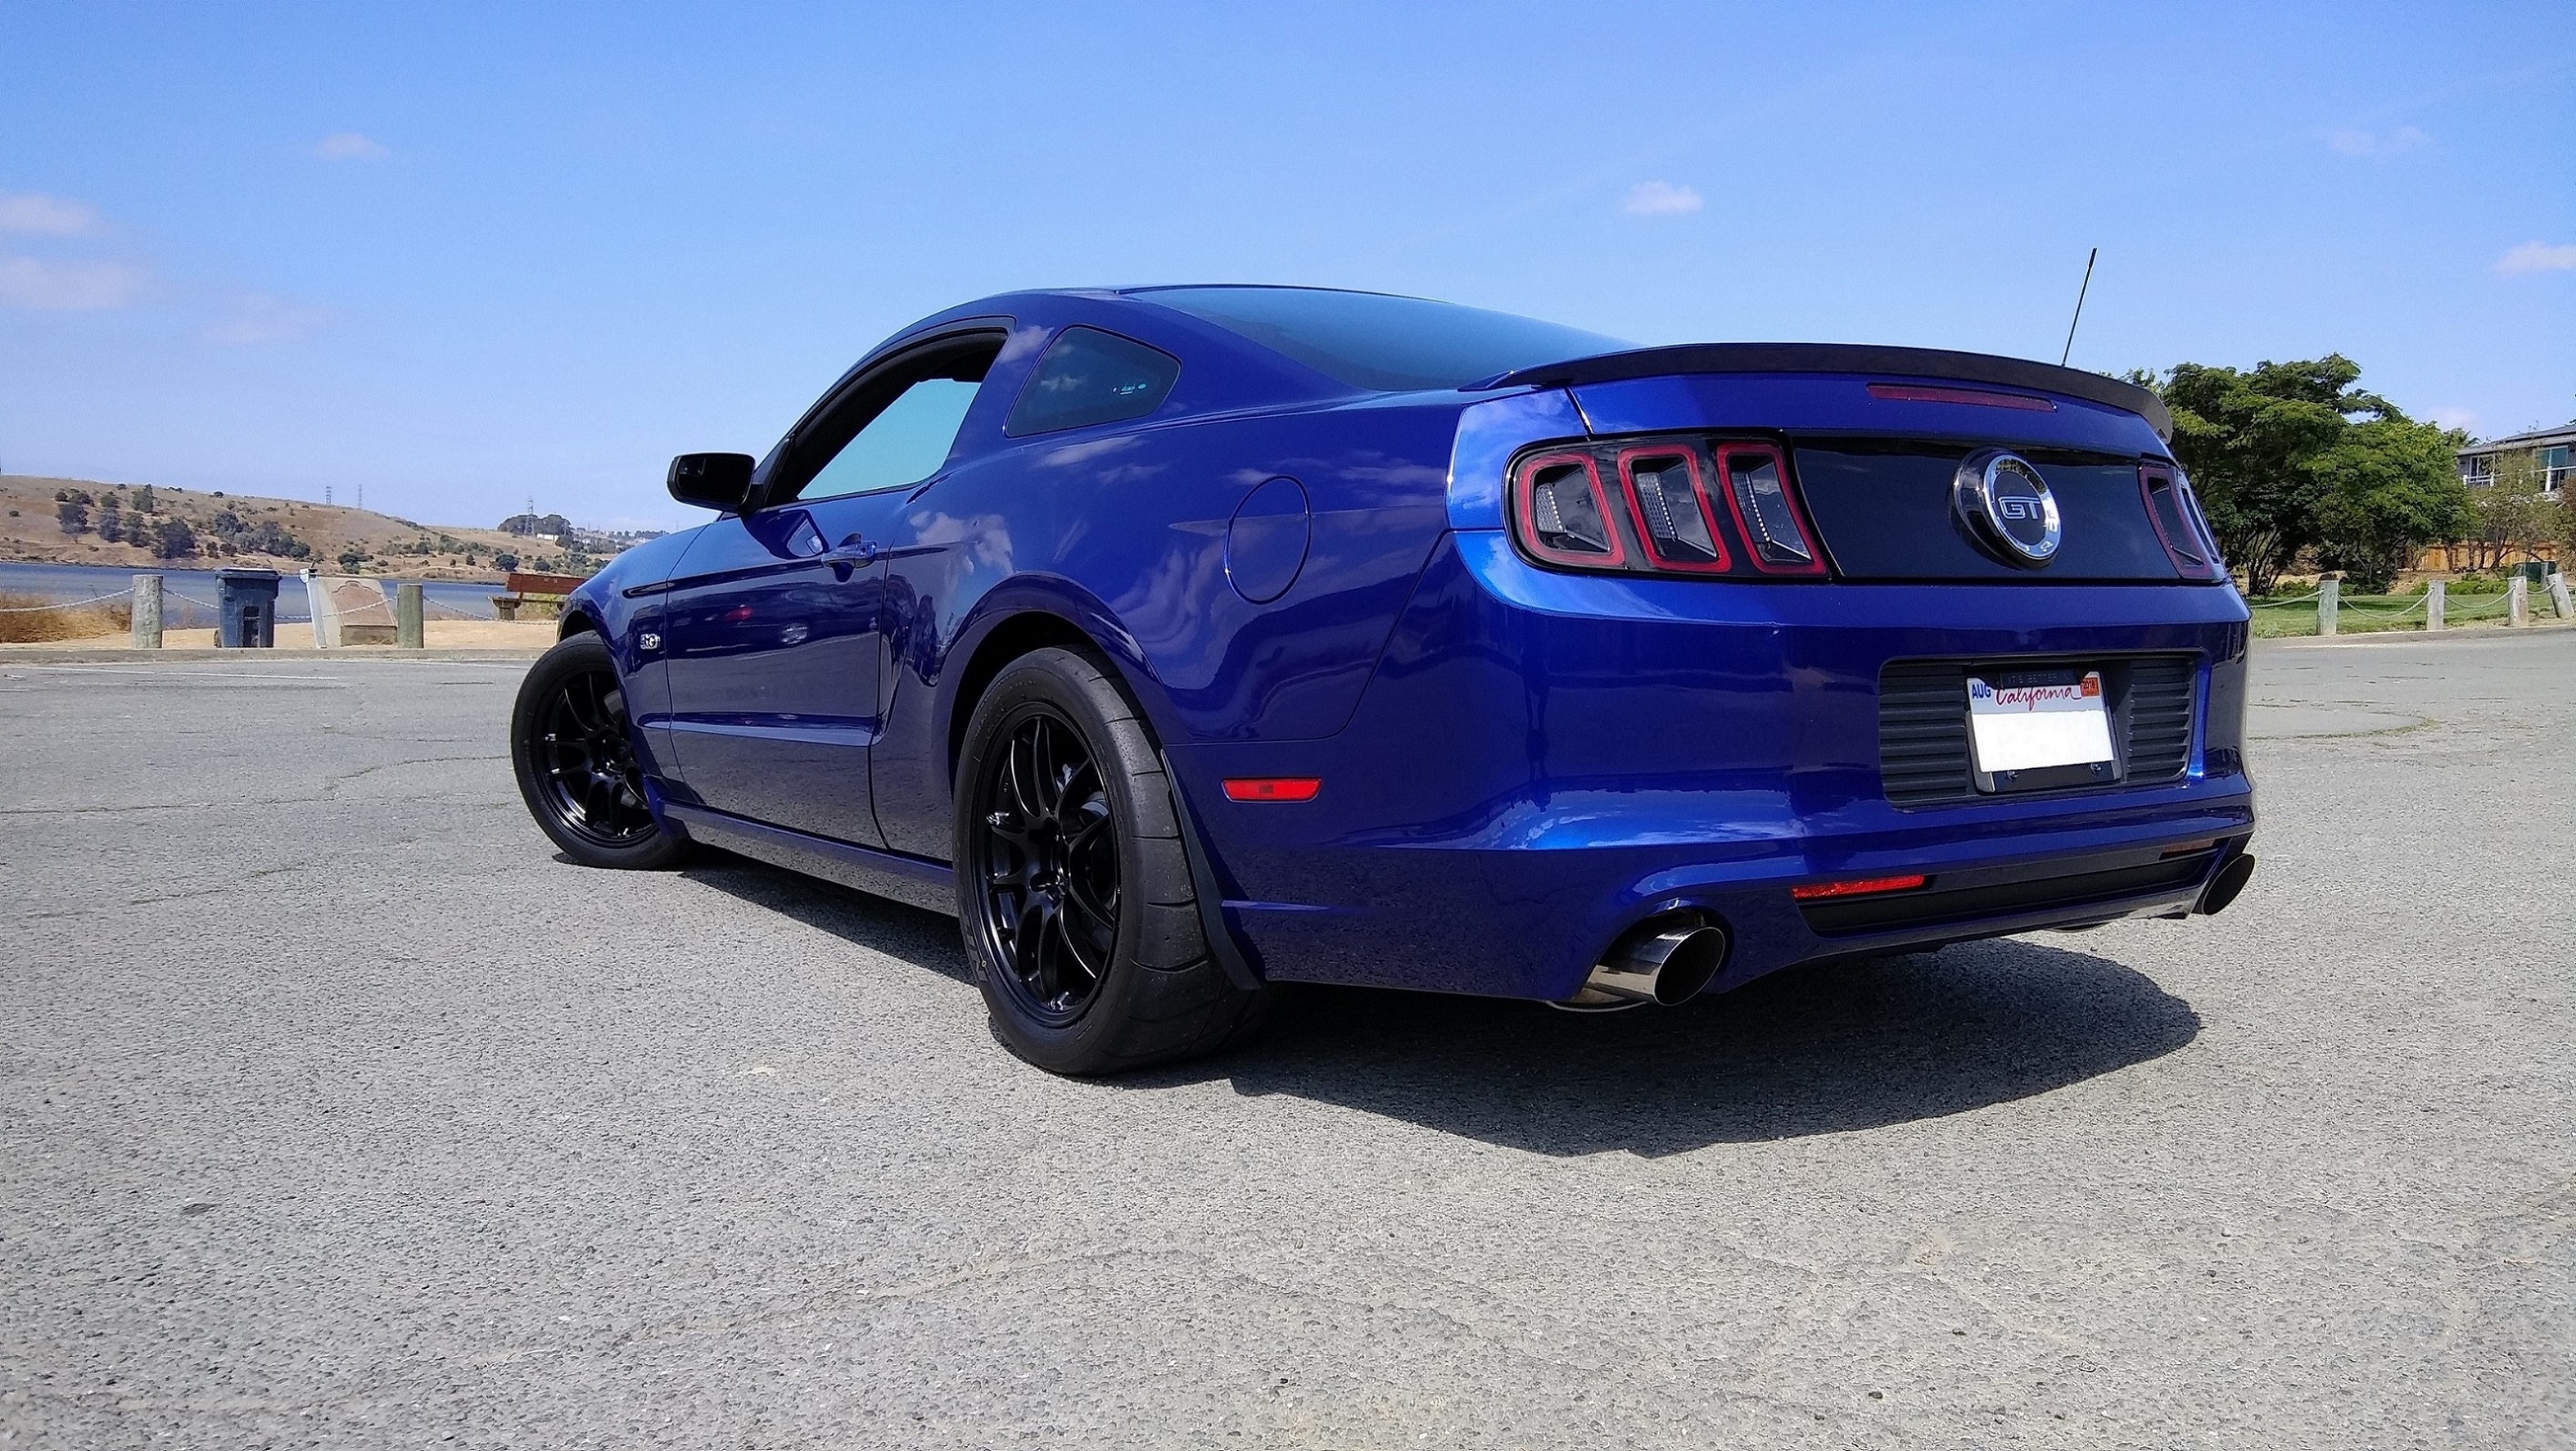
This is the Build Thread for DeepImpactBlues. Reply below.
- Welcome to the Ford Mustang forum built for owners of the Mustang GT350, BOSS 302, GT500, and all other S550, S197, SN95, Fox Body and older Mustangs set up for open track days, road racing, and/or autocross. Join our forum, interact with others, share your build, and help us strengthen this community!
You are using an out of date browser. It may not display this or other websites correctly.
You should upgrade or use an alternative browser.
You should upgrade or use an alternative browser.
S197 DeepImpactBlues Build Thread Profile - S197 Mustangs
- Thread starterStangra
- Start date
This site may earn a commission from merchant affiliate links, including eBay, Amazon, and others.
More options
Who Replied?- Thread starter
- #2
This will be an involved project for me, transferring parts from my previous car and restoring damage. An overall rebuild begins...
I got the car in November and have stripped the front bodywork off, revealing some (minor?) underlying damage. It's currently on a frame rack to be tweaked back into shape, and replace the upper radiator support:


I got the car in November and have stripped the front bodywork off, revealing some (minor?) underlying damage. It's currently on a frame rack to be tweaked back into shape, and replace the upper radiator support:
Bill Pemberton
0ld Ford Automotive Racing Terror
I am hoping the Blues will impact you in a different manner in the joy of building your own RaceHorse!
Dave_W
Cones - not just for ice cream
Nice color. Good luck on the rebuild. Looks like it might be a candidate for the FRPP tubular bumper.
 performanceparts.ford.com
2005-2014 MUSTANG LIGHTWEIGHT TUBULAR FRONT BUMPER
2005-2014 MUSTANG LIGHTWEIGHT TUBULAR FRONT BUMPER|Ford Performance Parts
performanceparts.ford.com- Thread starter
- #5
It would be, and I've been giving that a lot of thought. I probably won't go that way, I just bought a new bumper cover and don't really want to cut it for a tow hook. I like the look of the hook below the bumper, in the grille, I've got a Blowfish Racing hook from my last car that I'll probably use.Nice color. Good luck on the rebuild. Looks like it might be a candidate for the FRPP tubular bumper.2005-2014 MUSTANG LIGHTWEIGHT TUBULAR FRONT BUMPER
2005-2014 MUSTANG LIGHTWEIGHT TUBULAR FRONT BUMPER|Ford Performance Parts
One less part to buy too
")
_3_(1)_2.jpg")
- Thread starter
- #6
Just got my car is back from the body shop. Frame re-aligned and upper radiator support & bumper bar are replaced. The new fenders, hood and bumper cover were mocked in place to confirm the fit and fair of all panels, it's damn close, maybe some more minor adjustments needed. I can't tell if the few slight issues are from the underlying frame position or just part of the fitment of aftermarket panels to an otherwise straight car, but these can be resolved.


Now, with a workable chasis, the real work is about to begin !...
Now, with a workable chasis, the real work is about to begin !...
- Thread starter
- #7
I understand.... completely!... I seriously considered buying a BIW and transferring all the parts over, but when I scoped out the work in doing that I gave it up, just way beyond what an old guy with a basic home garage can do if you still want to have a life outside of the car.
- Thread starter
- #8
Well I've finally got the engine/tranny removed (almost) from the car. It's disconnected and lowered but my quickjacks are not nearly high enough to roll it out from under the chassis.


Ran out of time today but got a chain in place on the bumper bar and I installed a D-ring hoist point on the header beam for the garage door.

I've got the car as close as I can get it to the garage door for a nearly vertical lift. I had to adjust the up stop limit on the door and get it to retract farther to make this happen. Needed a bit more time to raise the chassis and clear the engine from underneath because the garage door has gotta be open for access to the lift point as well as room to roll out the engine...
the door stays open untill I can detach from the D-ring.
I had some concerns about the reliability of this scheme. After removing the weight of the entire front suspension, engine, and transmission, having the car supported at the standard rear lift points and the full weight of everything aft of them still installed, I can actually lift the front of the car by hand (with effort)
So I expect no collapsing header beams or such, and I'm pretty sure this D-ring is overkill rated!

Ran out of time today but got a chain in place on the bumper bar and I installed a D-ring hoist point on the header beam for the garage door.
I've got the car as close as I can get it to the garage door for a nearly vertical lift. I had to adjust the up stop limit on the door and get it to retract farther to make this happen. Needed a bit more time to raise the chassis and clear the engine from underneath because the garage door has gotta be open for access to the lift point as well as room to roll out the engine...
the door stays open untill I can detach from the D-ring.
I had some concerns about the reliability of this scheme. After removing the weight of the entire front suspension, engine, and transmission, having the car supported at the standard rear lift points and the full weight of everything aft of them still installed, I can actually lift the front of the car by hand (with effort)
So I expect no collapsing header beams or such, and I'm pretty sure this D-ring is overkill rated!
- Thread starter
- #9
Today the engine was completely removed.


Now I just gotta get it outta my way, anyone want a 3.7L/6R80 combo?!
Now I just gotta get it outta my way, anyone want a 3.7L/6R80 combo?!
- Thread starter
- #10
It seems like every "afternoon" task takes me 3 times longer than I expected! Sound familiar? That being said, I have been able to make some progress in between going to work and life happening. I've removed a bunch of stuff from the engine bay, The "rat fur" firewall insulation, ABS module & brake lines, master cyl. and booster, steering column, and most of the fwd wiring harness. It seems that the plug for the wiper motor is only accessable with the motor removed, has anybody been able to disconnect it without removal? A few more things and I'll be ready to prep for painting of the engine bay and all the replaced chassis parts that are still in Ford's black primer.
I've got half of the parts I've removed either under or inside the car. Disassembling 2 cars simultaneously in a home garage environment is going to be, umm...
challenging!

Access to finish disconnecting the front harness from everything under the dash will be easier with a lot of the dash removed, and since I'll be swapping over most of what's in there from the other car, I went ahead and started gutting the interior too. The automatic shifter is out, the stick shift & pedals from the other car will be installed later.

This is my first attempt at dismantling a car to this extent under the dash, and along the way I'm finding quite a bit of appreciation for the engineering. Designing, and manufacturing all these bits and pieces to fit together and form a compact, well finished and functional assembly, it's very impressive, except...
Damn electrical connectors! I'm sure these things just snap right together, but disconnecting is entirely different. I'm not a very good contortionist, and it doesn't help that they are invariably oriented with the release tabs in the least accessible position, or where only one hand fits, or where ya can see or touch 'em but not at the same time!
There must be an electrical connector design-of-the-month prize or something, why else would there be about 6 dozen different styles of connection retention when a universal set of maybe 3 or 4, scaled up or down as needed could work almost everywhere? Maybe to distinguish different plugs in proximity???
Back in the engine bay I took the opportunity to cut out my strut towers for clearance to gain more camber before painting
Before (R/H): After (L/H):
It may go without saying to many but to anyone considering doing this that doesn't know, a cheap bi-metal hole saw will struggle and probably die trying to cut this hole, don't ask me how I know. A carbide tipped cutter cuts nice smooth spirals of steel, much easier!
 and the Vorshlag tool is great:
I no longer need the tool and cutter, if interested:
I've got half of the parts I've removed either under or inside the car. Disassembling 2 cars simultaneously in a home garage environment is going to be, umm...
challenging!
Access to finish disconnecting the front harness from everything under the dash will be easier with a lot of the dash removed, and since I'll be swapping over most of what's in there from the other car, I went ahead and started gutting the interior too. The automatic shifter is out, the stick shift & pedals from the other car will be installed later.
This is my first attempt at dismantling a car to this extent under the dash, and along the way I'm finding quite a bit of appreciation for the engineering. Designing, and manufacturing all these bits and pieces to fit together and form a compact, well finished and functional assembly, it's very impressive, except...
Damn electrical connectors! I'm sure these things just snap right together, but disconnecting is entirely different. I'm not a very good contortionist, and it doesn't help that they are invariably oriented with the release tabs in the least accessible position, or where only one hand fits, or where ya can see or touch 'em but not at the same time!
There must be an electrical connector design-of-the-month prize or something, why else would there be about 6 dozen different styles of connection retention when a universal set of maybe 3 or 4, scaled up or down as needed could work almost everywhere? Maybe to distinguish different plugs in proximity???
Back in the engine bay I took the opportunity to cut out my strut towers for clearance to gain more camber before painting
Before (R/H):
After (L/H):
It may go without saying to many but to anyone considering doing this that doesn't know, a cheap bi-metal hole saw will struggle and probably die trying to cut this hole, don't ask me how I know. A carbide tipped cutter cuts nice smooth spirals of steel, much easier!
and the Vorshlag tool is great:
I no longer need the tool and cutter, if interested:
- Thread starter
- #11
I've taken a little time to make my frame repairs look halfway decent by using a bit of body filler to blend in the reinforcing doublers to the frame rail on both sides:


And today I reached the point where I've got the engine bay completely stripped, and the dashboard out to the firewall:


While I'm waiting for the rest of my engine bay painting supplies and some better painting weather I guess I'll start the very same process on my donor car (I'll bet it's much fast the 2nd time!):
 trackmustangsonline.com
I've taken so much apart that it might seem difficult to remember how everything goes back, but I've taken a ton of pics, and fortunately for this project I have an intact (sort of!) sample waiting to donate many of the same parts.
And today I reached the point where I've got the engine bay completely stripped, and the dashboard out to the firewall:
While I'm waiting for the rest of my engine bay painting supplies and some better painting weather I guess I'll start the very same process on my donor car (I'll bet it's much fast the 2nd time!):
2014 Mustang GT_50L HPDE/Track - Profile: Stangra DIB GT - TrackMustangsOnline.com
Street Fun Track Day Toy. View specs, mod list, and build thread for this Mustang and other S197 Mustangs on TMO.
trackmustangsonline.comI've taken so much apart that it might seem difficult to remember how everything goes back, but I've taken a ton of pics, and fortunately for this project I have an intact (sort of!) sample waiting to donate many of the same parts.
- Thread starter
- #12
While waiting for my engine bay paint I took some time to prep everything. Scuffing and sanding in every nook and cranny took me a LONG time because I'm a first-time painter and don't know what good enough is, as a compulsive perfectionist I seem to maybe get too carried away. I could never be a profitable/productive auto body guy, but at least I know it was done with attention to detail and I can't afford to have it done by the kind of shop that would do this. Glad that it's ready now!

Working in a 2 car garage is not really an adequate space for something of this scope but I'm managing to make it work... so far! With so many parts to keep treck of I was more than happy to finally find a new home for the old V6/ auto transmission and clear up some room, good riddance!

I also had some time to think about and realize that I'm not happy with the vented fenders I bought. The sharp angular lines for the vents seem out of place, not in keeping with the rest of the body style in my mind. I curious what others think before I make changes. To soften the lines I mocked up some radius fillers at the corners. Better?


Working in a 2 car garage is not really an adequate space for something of this scope but I'm managing to make it work... so far! With so many parts to keep treck of I was more than happy to finally find a new home for the old V6/ auto transmission and clear up some room, good riddance!
I also had some time to think about and realize that I'm not happy with the vented fenders I bought. The sharp angular lines for the vents seem out of place, not in keeping with the rest of the body style in my mind. I curious what others think before I make changes. To soften the lines I mocked up some radius fillers at the corners. Better?
- Thread starter
- #13
I finally got all my painting stuff. Anybody that's done painting in CA probably knows, getting the good paint here is a problem, but I got some paint that'll work ok.
Having a proper place to paint is another issue, here's my redneck paintbooth:

Fans blowing in from the backdoor gave a little back pressure and kept overspray & fumes from getting past my juryrigged barrier.
Epoxy primer, color and urethane clear applied:


I have a few paint flaws I need to address but forward progress is happening.
My Cortex K-member just arrived after a 17 week lead time, I can't wait to finish up in here and start building!
Having a proper place to paint is another issue, here's my redneck paintbooth:
Fans blowing in from the backdoor gave a little back pressure and kept overspray & fumes from getting past my juryrigged barrier.
Epoxy primer, color and urethane clear applied:
I have a few paint flaws I need to address but forward progress is happening.
My Cortex K-member just arrived after a 17 week lead time, I can't wait to finish up in here and start building!
The radiused vent corners look better and go with the S197 body style better imo. The sharp angle is more S550. This will be tough to get "juuuuuust right". I'd hang and fender and step way back to get an idea of the proper radius... That's if you're thay picky (I am). Still really cool and I've thought about going this route in the future.While waiting for my engine bay paint I took some time to prep everything. Scuffing and sanding in every nook and cranny took me a LONG time because I'm a first-time painter and don't know what good enough is, as a compulsive perfectionist I seem to maybe get too carried away. I could never be a profitable/productive auto body guy, but at least I know it was done with attention to detail and I can't afford to have it done by the kind of shop that would do this. Glad that it's ready now!
View attachment 94517
Working in a 2 car garage is not really an adequate space for something of this scope but I'm managing to make it work... so far! With so many parts to keep treck of I was more than happy to finally find a new home for the old V6/ auto transmission and clear up some room, good riddance!
View attachment 94518
I also had some time to think about and realize that I'm not happy with the vented fenders I bought. The sharp angular lines for the vents seem out of place, not in keeping with the rest of the body style in my mind. I curious what others think before I make changes. To soften the lines I mocked up some radius fillers at the corners. Better?
View attachment 94519
View attachment 94520
Looking really good Doug! And the radius on those fenders looks great IMO.
- Thread starter
- #16
If you do, be aware that fenders like these are far from ready to bolt on and paint. They are not as rigid as the OEM and flex/bow/twist when trying to match up the body lines and gaps. Getting one spot right tends to introduce errors elsewhere. Mine need several shims, some edge trimming, a little thickness reduced in spots & build-up in others, and they have a slightly rippley surface in areas which will need some primer/filler & block sanding to get perfectly flat.The radiused vent corners look better and go with the S197 body style better imo. The sharp angle is more S550. This will be tough to get "juuuuuust right". I'd hang and fender and step way back to get an idea of the proper radius... That's if you're thay picky (I am). Still really cool and I've thought about going this route in the future.
I'm compulsively picky too and will do what it takes, but it's gonna be time consuming.
Oh, so I thought these were some extra steel fenders that you (or someone else) worked over. Are these aftermarket fiberglass or something?
- Thread starter
- #18
Yes, these:Oh, so I thought these were some extra steel fenders that you (or someone else) worked over. Are these aftermarket fiberglass or something?

2010-2014 Mustang Fiberglass NX2 Fenders
Keep your cool with our functional 2010-2014 Mustang Fiberglass NX2 Fenders! They extract heat from you engine bay and from your brakes! Check them out here
 trufiber.com
TMO Supporting Vendors


