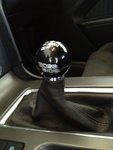
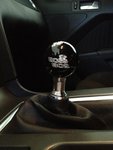
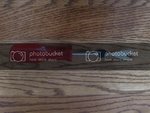
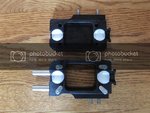
First step, watch the videos posted on the MGW web site;
http://mgwltd.com/2011-short_throw_shifter-instructional_videos.shtml
Gather the required tools, you want to get the front end as high up in the air as you can to make it easier on you. As others have said, if you have a partner available to help, you can easily shave 30-45 minutes out of the total 2.5-3.0 hour job. The most important tool you will need to accomplish the task is a good strap wrench. I tried using the smaller one in this set, all it did was spin on the knob.
http://www.lowes.com/pd_253674-16878-50540_0__?Ntt=kobalt+strap+wrench&productId=1072405&rpp=16
So I put the hair dryer on high for a solid 5 minutes on the shaft, and used the big boy. You really have to cinch the strap tight and apply maximum leverage. This is more easily done in the passenger seat without the steering wheel in the way. I ordered my MGW with the shaft to reuse the existing shift ball. Therefore I didn't really care when the knob came off the shaft with the chrome trim post still attached to the stock ball. Should you order a replacement ball and need to separate the trim post from the stock ball, it's quite possible you may ruin one or the other attempting to get them apart. I guess you could take the ball and trim shaft and screw it onto the new MGW shaft, then put it in a vice with the appropriate material to protect the trim shaft and then hit it with a lot of heat and try to get the knob off. I didn't have to worry about this, so consider ordering both shafts from MGW and perhaps even an extra knob in case the unexpected happens.
Once the knob was off, removal of the console was as straight forward as the video shows. Everything came right apart with ease, and once the ball was off, I had the console out in under 2 minutes. If you have a partner, they can be under the car with a deep socket at the end of a 6" extender to start getting the rear bracket loose. Make sure you have enough lighting to see what you are doing. I used a 6" and a 3" extension to be able to turn the ratchet and not hit the exhaust. The retaining nuts aren't that tight, so they will come right off. As mentioned in the video, you will have to get these off before you can get passenger side rear bolt off from the OEM upper shift assembly. The body opening oval only allows easy access to the other 3. Pay special attention to the section of the instructional video where George mentions the driver side retaining clip. Now he's got smaller hands & fingers than I do, I was unable to compress that clip to be able to slide it down off the bolt. Had to get my buddy to get under there to get it off after I wrestled with it for 10 minutes w/o success. You have been warned!
I didn't take many pictures of disassembling the OEM unit as the video shows this quite well enough already. Once the top 4 bolts are out you can pull the OEM POS out, and have large ziplock bag handy to drop it into so you don't get grease on your seats or carpet. Follow what George does, and peel off the top gasket, and then wedge a finger down into the unit and pull up on the shift arm. This will dislodge the 2 plastic pieces that seal the front and rear of the shift body, and the wiggle off the front dust boot.
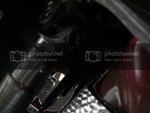
If you have buddy under the car, he can loosen the 3 bolts that attach the support bracket to the shifter. Once those are off, you can lift the shift selector arm up out of the way and remove the lower shift assembly out of the car. This is what it looks like just before you lift the arm up and slide the unit out after removing the 3 bolts from the support bracket on the driver's side;
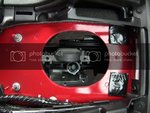
The videos show a lot of procedures on a shop cart, but inside the car it's a different story. It's kind of a pain to install the lower half of the shifter assembly under the shifter selector arm because there's nothing to hold it in place. I had it slip off a few times and the thought occurred to me after the fact I could have put a thick towel or rag on top of the driveshaft to provide support while trying to set the shift selector arm into the lower shift assembly with the 2 bushings. You can't screw it up as the red split one goes in front of the shift cup, and the white one in the rear. Line up the upper assembly to drop over the lower assembly with the bolts already in place and guide them through the holes. Tighten them up from under the car with the lock washers and nuts. I didn't bother with loc-tite on these. You can only snug fit these for now and then go back in run them down the rest of the way later, but I didn't see the point and just tightened them up with wrist pressure. Here are the assembled upper and lower assemblies ready for the shifter assembly to drop in.
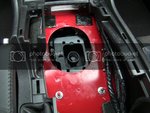
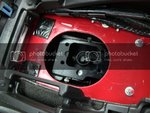
Then you get out the teflon grease and apply as shown in the video. Next comes the spring and 2 spring caps. Before getting ready to drop the new upper shift assembly into place, you would have already transferred over the factory pivot cup, use the same 2 thumb technique as shown in the video. Drop in the shifter assembly after putting in the greased up spring in the base assembly. You have to keep pressure on the shifter to keep it vertical so you can line up the pivot cup to drop into the shift selector arm while also guiding the spring on the left into the hole in the upper assembly. Once that's done, time to drop in one of the 4 allen head bolts that hold the shifter assembly to the upper shifter body. I ran one in while keeping pressure on the unit to keep everything aligned properly. Once I had one of the bolts in snug tight, I then installed the rest with loc-tite, and then backed out the one w/o loc-tite and applied it to the last.
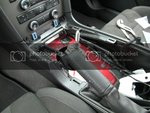
In addition to deep sockets, a metric set of ratcheting box end wrenches help out a great deal on this job. We hadn't yet pulled the factory drive shaft, so I had to work around it up until just before I installed the MGW heat shield. Once the 4 nuts seal the 2 halves of the shifter assembly together, you have to align the studs on the driver's side of the shifter to the shifter support bracket. The stud closest to the firewall goes through a hole in bracket, but the next one just sits in a slot. Loc-tite the nuts to these studs and just make them snug, do not over torque. Now you can install the rear bracket, it just slides right on the the end of the shift assembly over the 2 protruding posts that point toward the rear axle. I opted to use the extra thin rubber gasket supplied with the kit which was optional.
Now you can finally finish up top, and apply the Dynamat as best you can. I didn't go too crazy trying to cover every square millimeter as you can see here.
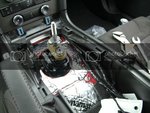
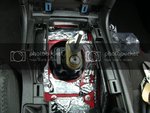
The last tough job you have is the proper fitment of the MGW dust boot. I believe that it is this area where some people report a significant increase in noise may be due to improper seals of the inside lower collar to the shifter body. As you can see from the following shots, there is a channel all the way around the shifter assembly that you must work hard to get the lower inside collar to fit snug *all the way around*. It's easy to get the side closest to you toward the rear of the car to fit in the slot, but without really working hard you may end up not getting a snug fit up front!
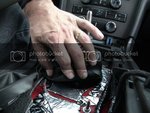
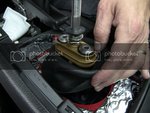
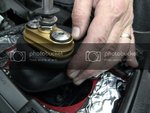
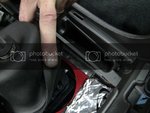
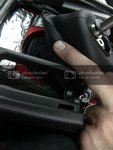
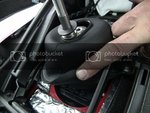
Follow the advice included in the kit recommending that you snug this lower seal by working on your fingers inside the boot, to snug it around the entire slot. You will know you have right when it's snug in the slot and looks like this.
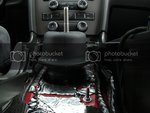
Then you can work the lower outer seal of the boot around the body opening. Make sure you didn't go crazy with the Dynamat and get too close the body opening or it will make it difficult to seal up this part.
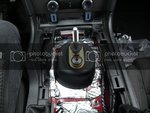
The top seal is easy after all the wrangling needed for the bottom two, and it should look like this, and feel solid.
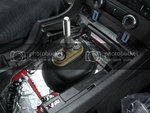
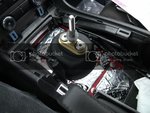
Now you can add in the MGW supplied noise pad, and then the factory pad.
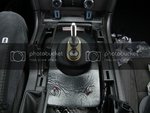
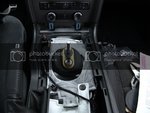
Before wrapping this up, you need to test fit the knob so the shift pattern lines up as desired by adjusting the jam nut as shown in the instructional video. Mine is not super silly tight like the factory death grip, and I can twist it off by hand if I really torque it. But with every day use it hasn't moved at all 4 days driving.
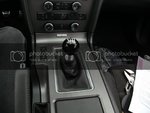
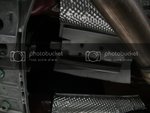
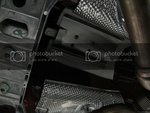
With the drive shaft finally out, installing the insulation and heat shield took all of 5 minutes, used a little loc-tite on these nuts.
The first few shifts felt 'clunky' compared to the old one. You definitely need to row through the gears and give it time to break in. I have noticed over the past few days that when I first startup the car in the morning, and everything is cold, that the first few shifts are noisy and feels 'ratchety'. After a few shifts and the car warms up, the louder noises and harsher mechanical feeling disappears. I've taken a few videos to try and capture this, but will save that for another day.
If I've made any mistakes in this post or listed something out of order, feel free to call me out on it, so I can modify it so everyone can have a correct refererence in the future. Hope this helps all of you future MGW installers, it's one of the best mods you can do.
http://mgwltd.com/2011-short_throw_shifter-instructional_videos.shtml
Gather the required tools, you want to get the front end as high up in the air as you can to make it easier on you. As others have said, if you have a partner available to help, you can easily shave 30-45 minutes out of the total 2.5-3.0 hour job. The most important tool you will need to accomplish the task is a good strap wrench. I tried using the smaller one in this set, all it did was spin on the knob.
http://www.lowes.com/pd_253674-16878-50540_0__?Ntt=kobalt+strap+wrench&productId=1072405&rpp=16
So I put the hair dryer on high for a solid 5 minutes on the shaft, and used the big boy. You really have to cinch the strap tight and apply maximum leverage. This is more easily done in the passenger seat without the steering wheel in the way. I ordered my MGW with the shaft to reuse the existing shift ball. Therefore I didn't really care when the knob came off the shaft with the chrome trim post still attached to the stock ball. Should you order a replacement ball and need to separate the trim post from the stock ball, it's quite possible you may ruin one or the other attempting to get them apart. I guess you could take the ball and trim shaft and screw it onto the new MGW shaft, then put it in a vice with the appropriate material to protect the trim shaft and then hit it with a lot of heat and try to get the knob off. I didn't have to worry about this, so consider ordering both shafts from MGW and perhaps even an extra knob in case the unexpected happens.
Once the knob was off, removal of the console was as straight forward as the video shows. Everything came right apart with ease, and once the ball was off, I had the console out in under 2 minutes. If you have a partner, they can be under the car with a deep socket at the end of a 6" extender to start getting the rear bracket loose. Make sure you have enough lighting to see what you are doing. I used a 6" and a 3" extension to be able to turn the ratchet and not hit the exhaust. The retaining nuts aren't that tight, so they will come right off. As mentioned in the video, you will have to get these off before you can get passenger side rear bolt off from the OEM upper shift assembly. The body opening oval only allows easy access to the other 3. Pay special attention to the section of the instructional video where George mentions the driver side retaining clip. Now he's got smaller hands & fingers than I do, I was unable to compress that clip to be able to slide it down off the bolt. Had to get my buddy to get under there to get it off after I wrestled with it for 10 minutes w/o success. You have been warned!
I didn't take many pictures of disassembling the OEM unit as the video shows this quite well enough already. Once the top 4 bolts are out you can pull the OEM POS out, and have large ziplock bag handy to drop it into so you don't get grease on your seats or carpet. Follow what George does, and peel off the top gasket, and then wedge a finger down into the unit and pull up on the shift arm. This will dislodge the 2 plastic pieces that seal the front and rear of the shift body, and the wiggle off the front dust boot.

If you have buddy under the car, he can loosen the 3 bolts that attach the support bracket to the shifter. Once those are off, you can lift the shift selector arm up out of the way and remove the lower shift assembly out of the car. This is what it looks like just before you lift the arm up and slide the unit out after removing the 3 bolts from the support bracket on the driver's side;

The videos show a lot of procedures on a shop cart, but inside the car it's a different story. It's kind of a pain to install the lower half of the shifter assembly under the shifter selector arm because there's nothing to hold it in place. I had it slip off a few times and the thought occurred to me after the fact I could have put a thick towel or rag on top of the driveshaft to provide support while trying to set the shift selector arm into the lower shift assembly with the 2 bushings. You can't screw it up as the red split one goes in front of the shift cup, and the white one in the rear. Line up the upper assembly to drop over the lower assembly with the bolts already in place and guide them through the holes. Tighten them up from under the car with the lock washers and nuts. I didn't bother with loc-tite on these. You can only snug fit these for now and then go back in run them down the rest of the way later, but I didn't see the point and just tightened them up with wrist pressure. Here are the assembled upper and lower assemblies ready for the shifter assembly to drop in.


Then you get out the teflon grease and apply as shown in the video. Next comes the spring and 2 spring caps. Before getting ready to drop the new upper shift assembly into place, you would have already transferred over the factory pivot cup, use the same 2 thumb technique as shown in the video. Drop in the shifter assembly after putting in the greased up spring in the base assembly. You have to keep pressure on the shifter to keep it vertical so you can line up the pivot cup to drop into the shift selector arm while also guiding the spring on the left into the hole in the upper assembly. Once that's done, time to drop in one of the 4 allen head bolts that hold the shifter assembly to the upper shifter body. I ran one in while keeping pressure on the unit to keep everything aligned properly. Once I had one of the bolts in snug tight, I then installed the rest with loc-tite, and then backed out the one w/o loc-tite and applied it to the last.

In addition to deep sockets, a metric set of ratcheting box end wrenches help out a great deal on this job. We hadn't yet pulled the factory drive shaft, so I had to work around it up until just before I installed the MGW heat shield. Once the 4 nuts seal the 2 halves of the shifter assembly together, you have to align the studs on the driver's side of the shifter to the shifter support bracket. The stud closest to the firewall goes through a hole in bracket, but the next one just sits in a slot. Loc-tite the nuts to these studs and just make them snug, do not over torque. Now you can install the rear bracket, it just slides right on the the end of the shift assembly over the 2 protruding posts that point toward the rear axle. I opted to use the extra thin rubber gasket supplied with the kit which was optional.
Now you can finally finish up top, and apply the Dynamat as best you can. I didn't go too crazy trying to cover every square millimeter as you can see here.


The last tough job you have is the proper fitment of the MGW dust boot. I believe that it is this area where some people report a significant increase in noise may be due to improper seals of the inside lower collar to the shifter body. As you can see from the following shots, there is a channel all the way around the shifter assembly that you must work hard to get the lower inside collar to fit snug *all the way around*. It's easy to get the side closest to you toward the rear of the car to fit in the slot, but without really working hard you may end up not getting a snug fit up front!


Follow the advice included in the kit recommending that you snug this lower seal by working on your fingers inside the boot, to snug it around the entire slot. You will know you have right when it's snug in the slot and looks like this.

Then you can work the lower outer seal of the boot around the body opening. Make sure you didn't go crazy with the Dynamat and get too close the body opening or it will make it difficult to seal up this part.

The top seal is easy after all the wrangling needed for the bottom two, and it should look like this, and feel solid.


Now you can add in the MGW supplied noise pad, and then the factory pad.


Before wrapping this up, you need to test fit the knob so the shift pattern lines up as desired by adjusting the jam nut as shown in the instructional video. Mine is not super silly tight like the factory death grip, and I can twist it off by hand if I really torque it. But with every day use it hasn't moved at all 4 days driving.

With the drive shaft finally out, installing the insulation and heat shield took all of 5 minutes, used a little loc-tite on these nuts.


The first few shifts felt 'clunky' compared to the old one. You definitely need to row through the gears and give it time to break in. I have noticed over the past few days that when I first startup the car in the morning, and everything is cold, that the first few shifts are noisy and feels 'ratchety'. After a few shifts and the car warms up, the louder noises and harsher mechanical feeling disappears. I've taken a few videos to try and capture this, but will save that for another day.
If I've made any mistakes in this post or listed something out of order, feel free to call me out on it, so I can modify it so everyone can have a correct refererence in the future. Hope this helps all of you future MGW installers, it's one of the best mods you can do.
