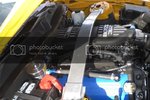
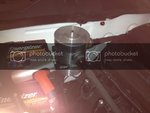
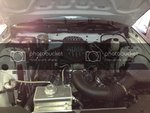
Thinking about getting an oil separator on the passenger side... Was wondering if anyone had any opinions about JLT versus Moroso...The Moroso looks more durable and I like the fact that is has all metal fittings. Looks like you might run into less problems with it breaking... Any thoughts? (I know the Moroso is a little more expensive, but I'd rather pay a little more if it's going to last longer. I heard though that I might need to replace those"heater hoses" as they're not really designed to withstand oil)
- Welcome to the Ford Mustang forum built for owners of the Mustang GT350, BOSS 302, GT500, and all other S550, S197, SN95, Fox Body and older Mustangs set up for open track days, road racing, and/or autocross. Join our forum, interact with others, share your build, and help us strengthen this community!
You are using an out of date browser. It may not display this or other websites correctly.
You should upgrade or use an alternative browser.
You should upgrade or use an alternative browser.
Different Oil Separator Installations
- Thread starter808Boss
- Start date
This site may earn a commission from merchant affiliate links, including eBay, Amazon, and others.
More options
Who Replied?Bossman2012 said:If I were to install an open breather tank with a filter open to the atmosphere like this one: http://www.americanmuscle.com/moroso-breather-tank.html
and route both cam cover breather hoses to it, and then plug both vacuum port side connectors (at the throttle body and the intake tube), would I get a check engine light due to vacuum leak? Basically I would be doing away with the PCV system, and just have an open breather.
No you will be fine and will not get a light/code or vacuum leak. You remove the vacuum at the intake. The only thing that will happen is when you are done hooking it up and removing the PVC valve on the pass side, the car will search for a new idle. Just start it up and let it sit for five minutes before driving. The best thing you can do is change this system and plug the vacuum lines to the intake. Because no matter what oil separator you use it will still suck oil into the intake, even if it is a little less with one, it will not stop it completely.
The setup you posted looks fine but I can find one advantage to the 302S and R setup I put into my car. If you run the lines downward toward the heads the can will not collect oil as it will run back into the engine. It acts only as a breather which is what you want. I suppose if you mount this setup correctly it will work the same.
Scott - thanks for the good info. I got my breather tank in the mail today. When you said in an earlier post you "removed the passenger PVC valve, broke out the internals and replaced the empty tube." - I know which tube you are referring to (the blue tube in the passenger side cam cover) - do I need to pull the whole blue tube out of the cam cover first before breaking out the PCV valve, and if so, how does it come out of the cam cover? If the blue tube does not need to come out first, how do I break out the PCV internals? I am a little afraid to start breaking things on my new motor without knowing what I'm doing and without new replacement pieces on hand! 
Bossman2012 said:Scott - thanks for the good info. I got my breather tank in the mail today. When you said in an earlier post you "removed the passenger PVC valve, broke out the internals and replaced the empty tube." - I know which tube you are referring to (the blue tube in the passenger side cam cover) - do I need to pull the whole blue tube out of the cam cover first before breaking out the PCV valve, and if so, how does it come out of the cam cover? If the blue tube does not need to come out first, how do I break out the PCV internals? I am a little afraid to start breaking things on my new motor without knowing what I'm doing and without new replacement pieces on hand!
You must remove the PCV from the car!
There are two things you can do.
1) go to the dealer and get the black tube that is on the drivers side, it is the same tube as the PCV on the passenger side without the valve.
2) Break out the valve on the blue PCV that is on the passenger side. It is simple to do, you need to remove it from the car, pull off the plastic valve cover first, then it will twist out. You will see the valve is held in at the bottom with a plastic cap, use a screw driver and pop that off, the rest of the internal valve parts will fall out. Another way to do it is find a screwdriver that will fit in the top and tap it out with a small hammer.
It is fairly simple to do and you will see this when you remove it from the car. However if I had to do it over I would have bought the black tube from the other side myself.
Thanks to Dean for his Moroso install photos and parts detail.
Summit Racing now has the end fittings in Black:
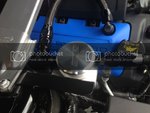
Also I was able to secure the mount under the cross brace with the MM Camber plates installed -- just enough bolt to torque on, with a couple of spacer washers on the rear bolt to level up.
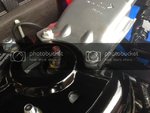
Summit Racing now has the end fittings in Black:

Also I was able to secure the mount under the cross brace with the MM Camber plates installed -- just enough bolt to torque on, with a couple of spacer washers on the rear bolt to level up.

Very nice. I may replace my Steeda oil separator with the Moroso over the Winter. I'll order a can of Kona Blue spray paint and paint both the bracket and brass fitting.
If you have the MM camber plates, be careful not to let the bolts drop when you loosen the 2 bolts on the cross brace. Unlike the OEM bolts they will drop loose. I loosened the nuts and then wrapped elastic bands around the bolts and secured them to the outboard strut bolts before removing the nuts. You can then cut the elastic on re-assembly once you have one of the nuts partially engaged (there's a plate that connects the two inboard studs under the strut tower, so as long as you have one stud secure you will not loose the other)
That's a great tip, thanks.
Re: Moroso versus JLT?
Trying to emulate a system like this. Just so I understand both of the tubes from the valve cover go to the oil separator correct? I can see the pass side, but not the drivers 100%.
Cap the intake holes that went to valve cover, got it.
You had mentioned gutting the PCV also, not understanding that or where exactly it is...
2012YellowBoss said:Got the canister installed today. Funny but the car did not search for an idle like it did when I just gutted the PCV before. It may have to do with the fact the vacuum is just capped off now. I would like to have the cut-out added to the firewall of the 13, that would make it easier to get at the cap.

Trying to emulate a system like this. Just so I understand both of the tubes from the valve cover go to the oil separator correct? I can see the pass side, but not the drivers 100%.
Cap the intake holes that went to valve cover, got it.
You had mentioned gutting the PCV also, not understanding that or where exactly it is...
I just ran across this at Rehagen Racing. What are they charging the extra bucks for?
http://rehagenracingproducts.com/RACING-BREATHER-KIT-BOSS-302-AND-COYOTE-50L-ENGINE-RR-6767-M50.htm
http://rehagenracingproducts.com/RACING-BREATHER-KIT-BOSS-302-AND-COYOTE-50L-ENGINE-RR-6767-M50.htm
- 159
- 0
Re: Moroso versus JLT?
JTRATX
Trying to emulate a system like this. Just so I understand both of the tubes from the valve cover go to the oil separator correct? Yes, run them uphill to the separator, it is more of a vent and not really a separator. If installed correctly you will see very little oil in it, mostly from vapor.
Cap the intake holes that went to valve cover, got it. and cap the one where the drivers side tube went into the intake tube.
You had mentioned gutting the PCV also, not understanding that or where exactly it is... the PCV valve is on the passenger side valve cover, twist it out then take (break) out the insides of it so you are left with just a tube. Another way is to order the tube that goes into the driver side valve cover, it looks like a PVC but is just a tube without any valve in it.
Look up at reply 103 on this page for more details.
Snake Handler said:I just ran across this at Rehagen Racing. What are they charging the extra bucks for?
http://rehagenracingproducts.com/RACING-BREATHER-KIT-BOSS-302-AND-COYOTE-50L-ENGINE-RR-6767-M50.htm
Profit?
I'm collecting parts for my DIY version of this and I can tell you I have already crested $200 in parts and that is without having to buy hose assembly tools and such. I'm a crybaby and springing for black anodized fittings and nice hose, but still...it's not cheap. Figure labor for assembling the hoses and I think $325 would have been a better price. None of my business, though. Maybe they hate making them.
The instructions and parts list is all here at BMO, so no reason not to just DIY. I will post photos, instructions, and my parts list as soon as my version comes together.
Jimmy
2012YellowBoss said:1) go to the dealer and get the black tube that is on the drivers side, it is the same tube as the PCV on the passenger side without the valve.
Hey guys, do we have a part number for this piece? I have almost everything I need to get started this week.
Jimmy
I have the part number at home but its for the pass side hose and connectors. My dealer couldn't find a connector part number without the hose.
NFSBOSS said:I have the part number at home but its for the pass side hose and connectors. My dealer couldn't find a connector part number without the hose.
Okay, so then maybe I am just misunderstanding something. I see your posted p/n for the hose and connectors. But I'm looking for the tube that one of the connectors conntects TO. Isn't there a plastic tube (no PCV valve) that goes into the head on the driver's side? That's the part I'm looking for, to be used to replace the passenger side PCV valve. Does that come with that assembly you already posted? I appreciate your help.
Or, if somebody can point me to an online parts catalog with illustrations, I can probably find my way. Or, maybe the part number is ON it and I can just look?
Jimmy
Jimmy Pribble said:Okay, so then maybe I am just misunderstanding something. I see your posted p/n for the hose and connectors. But I'm looking for the tube that one of the connectors conntects TO. Isn't there a plastic tube (no PCV valve) that goes into the head on the driver's side? That's the part I'm looking for, to be used to replace the passenger side PCV valve. Does that come with that assembly you already posted? I appreciate your help.
Or, if somebody can point me to an online parts catalog with illustrations, I can probably find my way. Or, maybe the part number is ON it and I can just look?
Jimmy
I'm picking up that part today. I'll post it tonight.
JTRATX said:I'm picking up that part today. I'll post it tonight.
Any luck with that p/n? I tried to find it using the online shop manual, but it only shows the PCV side. Thanks!
Jimmy
Jimmy Pribble said:Any luck with that p/n? I tried to find it using the online shop manual, but it only shows the PCV side. Thanks!
Jimmy
yes, 4L2Z-6762-AA
Finally finished my DIY write-up. Thanks to everyone who blazed the trail and helped me online and offline. Let me know if I need to revise anything. - Jimmy
Boss 302R/302S Racing-style Breather Can
The factory Boss Mustang PCV system increases engine pressure and forces oil into the engine intake, especially during hard track driving. This results in a slight loss of horsepower and a reduction in engine oil at a time when they are needed the most.
One solution is to use an oil separator. This fits in-line with the PCV system and separates oil and oil vapor into a catch can and returns only "clean" air back into the engine. This is a good system, but no oil separator is perfect and some amount of oil or oil vapor will continue to be injested through the intake via the PCV system.
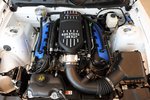
Ford Racing Boss 302S with factory racing breather system.
The 302R and 302S factory race cars use a simple breather system that bypasses the PCV system altogether. This system ensures that no oil is ingested through the intake and should free a couple of ponies. The downsides of this system are that it is more expensive than an oil separator and it almost certainly violates any emission system do-not-tamper laws that many states have, which might cause some trouble when trying to get your safety or emissions inspection sticker.
Ford Racing does not sell this system as a kit. Rehagan Racing does sell this system as a kit, but it is spendy at $425. I put together my own kit for about $235 using OEM parts and high grade hoses and fittings. My version is overkill and a budget-minded person could do this (assuming the use of the core Peterson breather can), for about $150.
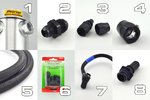
Parts:
[list type=decimal]
[*](1) - Peterson Fluid Systems 08-0400 Breather Can with AN -12 Ports (about $90), Link: http://amzn.to/WOzGUC
[*](2) - Summit 220244B - AN -10 to AN -12 Adapter Black (about $10.25/ea.)
[*](2) - Earl's AT800110ERL - AN -10 ST Ano-Tuff Swivel-Seal Hose Ends (about $13.25/ea.)
[*](2) - Fragola E-Z Clamp Hose End, -10 AN - Black (about $6.95/ea.)
[*](1) - Earl's 350610ERL - AN -10 PRO-LITE 350 HOSE 6 FOOT (about $57.95)
[*](1) - Dorman 02253 - Bypass Cap Assortment (about $5.00) + (2) hose clamps to secure the caps.
OEM Parts:
[*](1) - CR3Z-6A664-A - HOSE VENT ($9.44)
[*](1) - 4L2Z-6762-AA - ELBOW, CRANKCASE VENT ($11.31)
[/list]
Instructions:
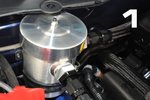
1. Mount the catch can.
Find a suitable location on the firewall in the same area as the factory race cars. Be sure to leave enough room to remove the top of the catch can for servicing. Measure and mark the location of the band clamp. Drill holes and mount band clamp with your choice of fastener. Since I don't see the need to ever remove the band clamp, I chose to use rivets. Secure the catch can with the band clamp. Orient the ports as shown in the photo.
Notes: I found that removing the upper strut brace made access easier. I also removed the sound deadening material that was against the firewall. Honestly, I just don't like the idea of 'moving blankets' stapled around the engine bay. If you don't remove it, you will have to cut or drill through it to mount the catch can. Finally, I had to remove one of the plastic pins that secures the cowl trim piece to the firewall to prevent interference with the catch can.
2. Make the hoses.
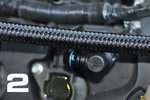
I would recommend first installing the hose ends that mate to the catch can. Connect the hose (using the AN -10 to AN -12 adapter) and tighten everything down (illustration 1). Then measure hose (twice) and cut (once) to proper length. Attach the two (2) plastic quick connectors from the driver's side vent tube that is no longer needed. Attach the plastic connectors to the hose using the clamp-style hose ends.
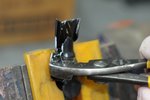
Notes: Removing the plastic OEM quick connectors from the vent tube is somewhat difficult, because the tube is hard plastic. I don't recommend trying to cut against the nipple, because any gouge could be a leak point. This is the technique I used. Cut the hose about 1" from the tip of the nipple. Then make two cuts into the hose. Grab the tab you have just formed with a pair of needle nose pliers. Then, holding the tip of the tab firmly, roll the pliers so that you are tearing a ribbon out of the hose. If you can get the ribbon all the way to the end of the hose, the pressure fit of the hose will be released and the connector will be free. I took the photo before I had perfected my technique and I was just trying to pull downward, but the ribbon would break before getting to the end. Thin needle nose pliers work better and the rolling technique is the way to go.
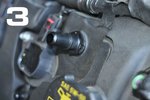
3. Replace PCV valve.
On the passenger side of the engine, remove the PCV valve from the head and replace with the same style crankcase vent elbow that is found on the driver's side. Alternately, you could remove the PCV valve assembly and discard the internal valve.
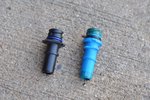
Notes: I don't think this matters in any way, but the PCV valve (blue) and the crankcase vent elbow (black) are not exactly the same length.
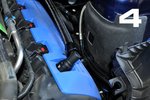
4. Connect the hoses to the crankcase vents.
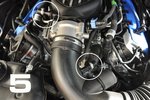
5. Cap the intake/vacuum nipples.
Finished!
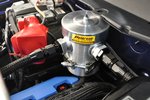
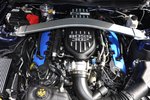
Notes and revisions:
Sharp eyes will notice that I used small rivets and washers to secure the band clamp. I had properly sized rivets set aside for the project, but once I got started, I realized that my rivet gun did not accommodate the shank of the large rivets. I will replace those soon, so that the can is properly secured.
As you can see, it is a very tight fit for the catch can. Another possible revision is to cut the top of the firewall for easier access for servicing the catch can. This can be seen in the photo of the factory setup at the top of the page. In truth, it's not that hard to service the catch can. It is only held in place by a band clamp. It can easily be released from that and tilted forward to clear the top of the firewall. A better revision that I am considering is getting the racing oil pan, tapping it, and running a drain from the catch can back into the oil pan. Then the catch can becomes service free.
Boss 302R/302S Racing-style Breather Can
The factory Boss Mustang PCV system increases engine pressure and forces oil into the engine intake, especially during hard track driving. This results in a slight loss of horsepower and a reduction in engine oil at a time when they are needed the most.
One solution is to use an oil separator. This fits in-line with the PCV system and separates oil and oil vapor into a catch can and returns only "clean" air back into the engine. This is a good system, but no oil separator is perfect and some amount of oil or oil vapor will continue to be injested through the intake via the PCV system.

Ford Racing Boss 302S with factory racing breather system.
The 302R and 302S factory race cars use a simple breather system that bypasses the PCV system altogether. This system ensures that no oil is ingested through the intake and should free a couple of ponies. The downsides of this system are that it is more expensive than an oil separator and it almost certainly violates any emission system do-not-tamper laws that many states have, which might cause some trouble when trying to get your safety or emissions inspection sticker.
Ford Racing does not sell this system as a kit. Rehagan Racing does sell this system as a kit, but it is spendy at $425. I put together my own kit for about $235 using OEM parts and high grade hoses and fittings. My version is overkill and a budget-minded person could do this (assuming the use of the core Peterson breather can), for about $150.

Parts:
[list type=decimal]
[*](1) - Peterson Fluid Systems 08-0400 Breather Can with AN -12 Ports (about $90), Link: http://amzn.to/WOzGUC
[*](2) - Summit 220244B - AN -10 to AN -12 Adapter Black (about $10.25/ea.)
[*](2) - Earl's AT800110ERL - AN -10 ST Ano-Tuff Swivel-Seal Hose Ends (about $13.25/ea.)
[*](2) - Fragola E-Z Clamp Hose End, -10 AN - Black (about $6.95/ea.)
[*](1) - Earl's 350610ERL - AN -10 PRO-LITE 350 HOSE 6 FOOT (about $57.95)
[*](1) - Dorman 02253 - Bypass Cap Assortment (about $5.00) + (2) hose clamps to secure the caps.
OEM Parts:
[*](1) - CR3Z-6A664-A - HOSE VENT ($9.44)
[*](1) - 4L2Z-6762-AA - ELBOW, CRANKCASE VENT ($11.31)
[/list]
Instructions:

1. Mount the catch can.
Find a suitable location on the firewall in the same area as the factory race cars. Be sure to leave enough room to remove the top of the catch can for servicing. Measure and mark the location of the band clamp. Drill holes and mount band clamp with your choice of fastener. Since I don't see the need to ever remove the band clamp, I chose to use rivets. Secure the catch can with the band clamp. Orient the ports as shown in the photo.
Notes: I found that removing the upper strut brace made access easier. I also removed the sound deadening material that was against the firewall. Honestly, I just don't like the idea of 'moving blankets' stapled around the engine bay. If you don't remove it, you will have to cut or drill through it to mount the catch can. Finally, I had to remove one of the plastic pins that secures the cowl trim piece to the firewall to prevent interference with the catch can.

2. Make the hoses.
I would recommend first installing the hose ends that mate to the catch can. Connect the hose (using the AN -10 to AN -12 adapter) and tighten everything down (illustration 1). Then measure hose (twice) and cut (once) to proper length. Attach the two (2) plastic quick connectors from the driver's side vent tube that is no longer needed. Attach the plastic connectors to the hose using the clamp-style hose ends.

Notes: Removing the plastic OEM quick connectors from the vent tube is somewhat difficult, because the tube is hard plastic. I don't recommend trying to cut against the nipple, because any gouge could be a leak point. This is the technique I used. Cut the hose about 1" from the tip of the nipple. Then make two cuts into the hose. Grab the tab you have just formed with a pair of needle nose pliers. Then, holding the tip of the tab firmly, roll the pliers so that you are tearing a ribbon out of the hose. If you can get the ribbon all the way to the end of the hose, the pressure fit of the hose will be released and the connector will be free. I took the photo before I had perfected my technique and I was just trying to pull downward, but the ribbon would break before getting to the end. Thin needle nose pliers work better and the rolling technique is the way to go.

3. Replace PCV valve.
On the passenger side of the engine, remove the PCV valve from the head and replace with the same style crankcase vent elbow that is found on the driver's side. Alternately, you could remove the PCV valve assembly and discard the internal valve.

Notes: I don't think this matters in any way, but the PCV valve (blue) and the crankcase vent elbow (black) are not exactly the same length.

4. Connect the hoses to the crankcase vents.

5. Cap the intake/vacuum nipples.
Finished!


Notes and revisions:
Sharp eyes will notice that I used small rivets and washers to secure the band clamp. I had properly sized rivets set aside for the project, but once I got started, I realized that my rivet gun did not accommodate the shank of the large rivets. I will replace those soon, so that the can is properly secured.
As you can see, it is a very tight fit for the catch can. Another possible revision is to cut the top of the firewall for easier access for servicing the catch can. This can be seen in the photo of the factory setup at the top of the page. In truth, it's not that hard to service the catch can. It is only held in place by a band clamp. It can easily be released from that and tilted forward to clear the top of the firewall. A better revision that I am considering is getting the racing oil pan, tapping it, and running a drain from the catch can back into the oil pan. Then the catch can becomes service free.
Awesome write-up Jimmy and this is now a sticky!
One item, do you need 2 or 4 hose clamps?
I have my stock hoses and they can be easily replaced should I need to pass a smog check. I also take them to the track with me just in case my current setup breaks (tip from cloud9).
One item, do you need 2 or 4 hose clamps?
I have my stock hoses and they can be easily replaced should I need to pass a smog check. I also take them to the track with me just in case my current setup breaks (tip from cloud9).
